As I said in a previous post, I’m taking some online classes from Philippa Naylor. Each month I’m given access to the next class in the series, and this month’s class was full of tips on how to do raw-edge appliqué. I played around with some samples, and that’s what you see in these photos.
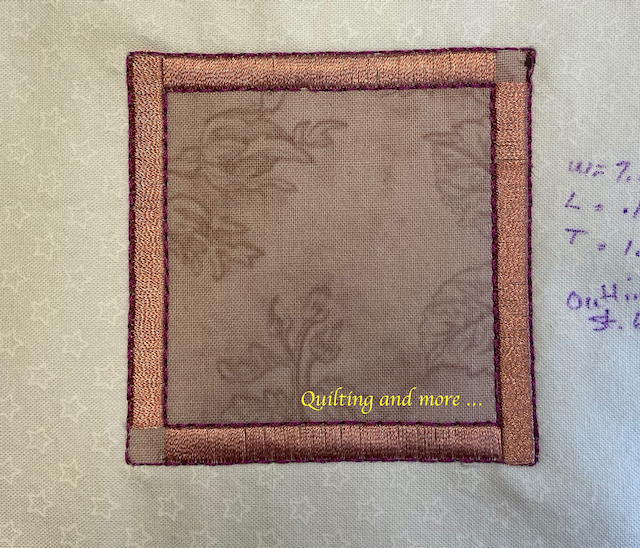
 This first picture shows some satin stitch appliqué on a square. I did two corners with butted edges and left two corners open, though they could be filled with a motif or a button or something. You’ll notice one rather messy corner — oops! The satin stitching is then outlined with a multiple straight stitch to tidy up the edges. I’ve noted my settings for this sample so as to have them for reference at another time. Those settings could change, of course, with a different machine or different fabrics and threads.

The next photo (on the right) shows two different treatments on circles. The first is similar to what was on the square, but the other is done with three-step zigzag and obviously needs more practice!


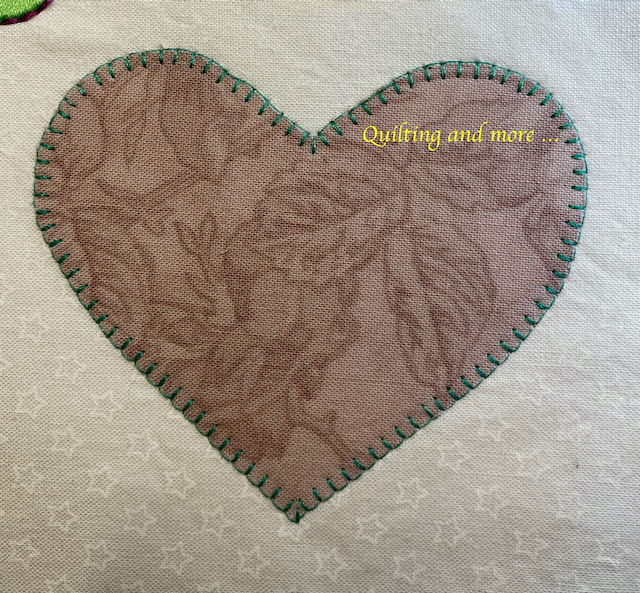
These last two photos are hearts done with blanket stitch. The two are done similarly, but then I tried the outlining on the heart on the right. The effect of that outlining isn’t as nice as on satin stitch, so it might not have been worth the effort. Still, the entire exercise was lots of fun, and I learned a lot!


4 thoughts on “Raw-edge appliqué”
Looks 👍 great to me
Thanks, Deena. 🙂
Great job. Love experimenting with new ideas! I will have to look this class up. Thanks for sharing.
Thanks, Candice! I hope you enjoy the class — she has an entire series, and they’re all excellent. I’ve rarely met a quilt teacher who is more generous with her informations than Philippa.