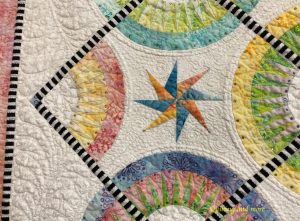
I saw this quilt at the Houston show in 2017 and fell in love with it. I finished adding the crystals (the final step) in June, 2018. The quilt was designed by Jacqueline DeJonge and is paper pieced.
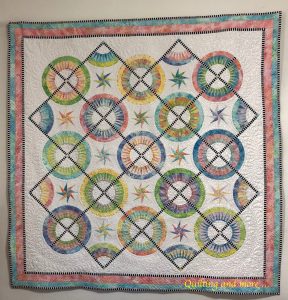
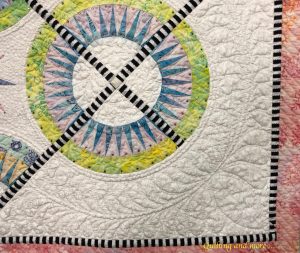
I quilted it with free-motion feathers and fillers, as well as some ruler work around the New York Beauty blocks and for the feather spines. The quilt measures 60″ x 60″.
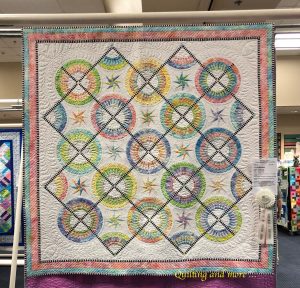
In April, 2019, our local guild hosted its annual quilt show, and La Vie Est Belle earned an Honorable Mention!
Blog post 1, 2, 3, 4, 5, 6
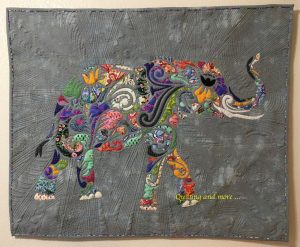
I saw this pattern, designed by Madisen Hastings, and fell in love with it. After all, elephants are majestic, intelligent, endangered, magnificent. The appliqué pieces were laser-cut from Tula Pink fabrics, and I chose a Grunge fabric to put them onto. I did a lot of free-motion ruler work and fills in that background to set off the elephant. I finished it in August, 2017, and it measures approximately 39″ x 32″. This was finished in August, 2017.
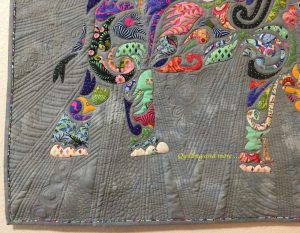
And here’s a detail of some of the quilting:
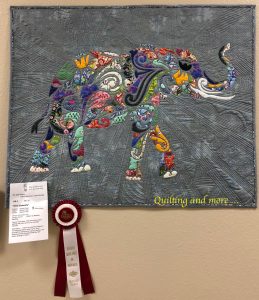
Update: I entered Holi Ganesha into our local show in March, 2018, and it won a second-place ribbon!
Blog post 1, 2
A local (but well-known national) quilter, Christa Watson, developed a pattern for a chevron quilt that my local group wanted to make (with Christa’s permission, of course). The original pattern called for 5″ squares to start with, but I decided to make mine a miniature, so my blocks finished at 1.5″, and I changed the layout to this herringbone design instead of the chevrons.
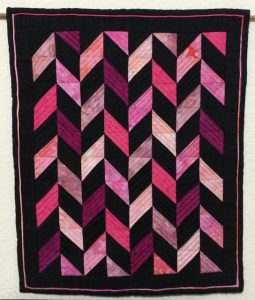
I did all of the free-motion quilting in straight lines to accent the design and to practice straight lines — they’re not easy to do in free motion with rulers. The border has a Greek key design, also in free-motion, and then I added my favorite piping before the binding, using four of the fabrics used in the quilt top. I finished this in just a couple of weeks in April, 2014.
Blog post
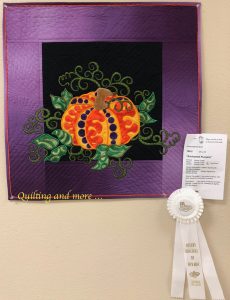
Another embroidered appliqué quilt, this was designed and digitized by Claudia Dinnell, though I did omit the title from the top border of the quilt. It measures approximately 25.25″ x 25.25″ and was finished in November, 2017.
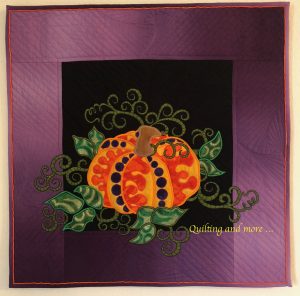
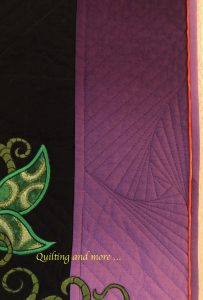
All of the quilting is free-motion ruler work, using diagonal lines that join in the center of the borders with a zentangle design.
Update: I entered Enchanted Pumpkin into our local show in March, 2018, and it won a third-place ribbon!
Blog post 1, 2, 3
This began as a kit — a very small kit — that I was given some years previously and had put away for “someday”. I got it out and decided to make it while I debated what my next “real” project would be. As I was making the blocks, it occurred to me that it would go pretty nicely in my granddaughter’s bedroom, which was mostly pink with some yellow. Since her birthday was coming up, I decided to make it as a gift for her. I used a ruler foot on my Bernina 780 to do the free-motion straight lines in the yellow triangles and then did spirals in the pink ones.
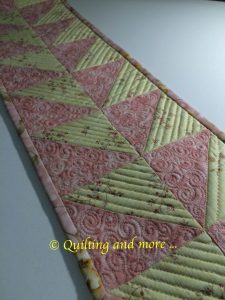
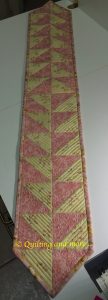
The dresser scarf measures approximately 41″ x 6.5″, and it was made in April, 2015, for the May 1 birthday.
Blog post 1, 2
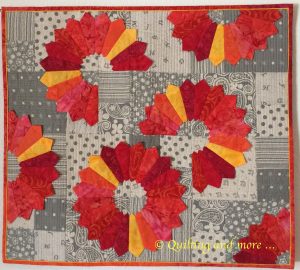
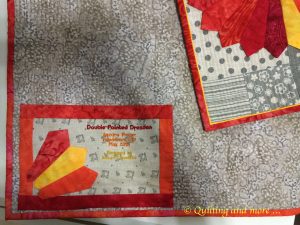
Calling this appliqué is probably correct, but it may be stretching the term a bit, too. Still, the plates were appliquéd onto the pieced background, so the term does fit. This was a pattern created by Susan Cleveland, and I really liked the double points on the plates’ wedges, made easy to do with Susan’s Prairie Pointer tool. The background is made from pieces of linen I’d purchased at a Houston show, and the wedges are bright batiks I had in my stash. I quilted straight lines in the background, dividing the quilt roughly into quarters and doing two of the quarters with horizontal lines and two with vertical lines. I added a few leftover plate wedges to the embroidered label on the back and used the narrow corded piping I like so much next to the binding. I finished the quilt in May, 2015, and it measures 26.5″ x 24″.
Blog post 1, 2
This quilt began as an idea to use some beautiful threads couched onto fabric, but I changed my mind enough times about how to approach it that it really didn’t turn out at all the way I’d intended — and so the title was born. 😉
The quilt is approximately 24″ x 24″, and the prairie points are floating in the seams, rather than attached all the way around. The quilting is a combination of free-motion and ruler work, and I added my usual piping before the binding. I finished this one in August, 2018.
Blog post
This was a design begun during a quilters’ cruise onboard Royal Caribbean’s Oasis of the Seas in April-May, 2014. Carol Doak was one of the instructors for the cruise, and she designed the quilt, but I shrank the blocks from 6″ to 2″. It was, of course, paper pieced.

The quilting is mostly curved crosshatching, done by machine.
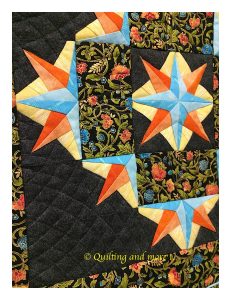
The quilt measures 16″ x 16″, and I finished it in May, 2014.
Blog post
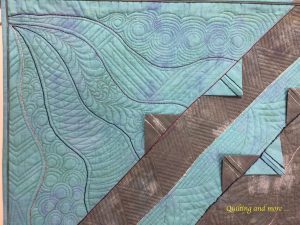
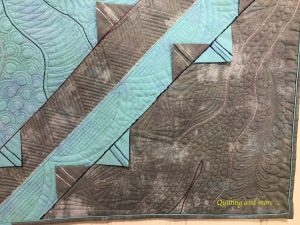
I saw this pattern from KwiltArt at the 2016 Houston Quilt Festival and couldn’t resist. It took me a while to get around to making it, but it’s finally done. I used this quilt as a “practice piece” to experiment with a variety of different ruler-quilting motifs, some of which were probably not the best choices. That’s life. 😉 I finished the quilt in June, 2017, and it measures roughly 60″ x 60″.
Update: I entered Convex Illusions into our local show in March, 2018, and it won an honorable-mention ribbon!

Blog post 1, 2, 3, 4
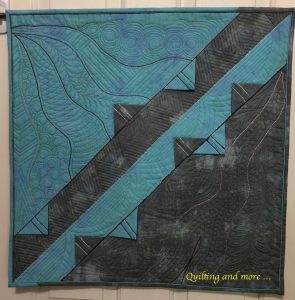
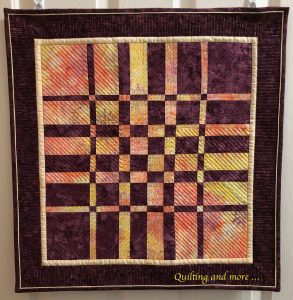
Our local guild offered a class on making Convergence quilts, and this is the one I did. I probably should have used four fabrics instead of two to give more interest, but that’s life. I did 1/4″ ruler work on the central portion, echoing uneven triangular shapes. The border has 1/4″ matchstick quilting, and I added my usual corded piping, followed by bias binding. The quilt measures roughly 23″ square, and I finished it in August, 2019.
Blog post