It suddenly became obvious that our grandson Benjamin had outgrown his baby quilt and that I needed to make him a new one quickly! Fortunately, I remembered that I’d purchased and stashed a pre-printed I Spy panel several months before — just in case. To that center panel I added borders of black with red polka dots and binding of red with black polka dots. I even found flannel for the back in black with tiny red polka dots.
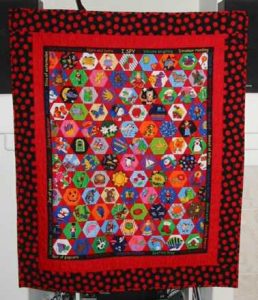
I used bright variegated thread to machine quilt around the printed motifs in the center and to do loops in the plain red border. The same thread was used to do more straight lines in the outer border. The quilt was ready in time for Benjamin’s third birthday in January, 2002, and measures 40 1/2″ x 48 1/2″.
This is the first baby quilt I ever made, and it’s also the first free-motion quilting I did. That’s pretty appropriate, I guess, since the quilt was intended for our first grandchild!
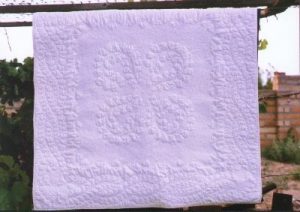
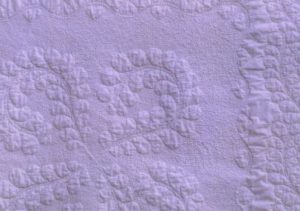
The quilt is approximately a yard wide and a yard long. This corresponds with an old tradition of giving a new baby a yard of cloth. The project was the result of a class in machine quilting, and it won a blue ribbon at our local county fair in 1998. Here’s a closeup of part of it:
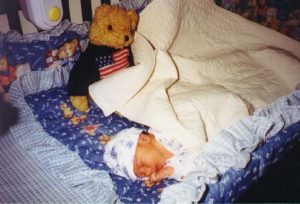
And now for a photo of the quilt in use! Our beautiful grandson was born on January 13, 1999, at 12:32 PM. He weighed 7 pounds, 2 ounces and was nineteen inches long. This picture was taken when Benjamin III (he was named for his daddy and his paternal grandfather) was just three days old! Isn’t he wonderful?
The thought of having to wash the large bed quilt I’d recently made was a bit daunting — having to do so frequently was even more so. Why would I have to do that? Why, because our adorable little Bisou loves to sleep at the foot of our bed, of course! 😉 The solution seemed pretty simple: make a bed runner for the foot of the bed. This could be washed much more easily than the entire quilt. I purchased a Moda layer cake grouping (about 40 10″ squares of coordinating fabrics) and found a simple pattern called “Slice of Cake” designed by Denise Sheehan. The leftover squares that weren’t needed for the quilt top became the backing. The bed runner was quick to make, and you can judge for yourself whether or not it’s serving its intended purpose:
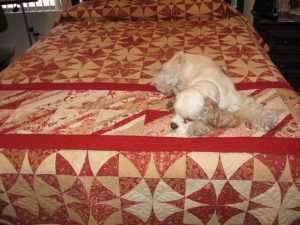
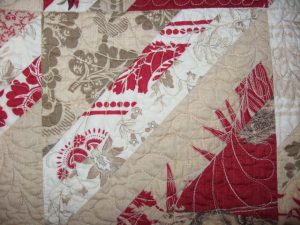
The runner ended up being about 19.5″ x 91″, completely machine pieced and machine quilted, and I finished it in May, 2011. Below, you can see a detail of the feathered quilting I did.
Blog post
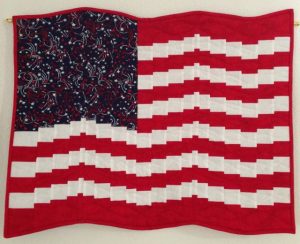
A friend of mine demonstrated how to make this small quilt at a meeting of our local quilt circle. I really liked the effect of the bargello, and I didn’t have a wall hanging in a patriotic theme, so I made this. It’s completely machine pieced and machine quilted and measures roughly 27″ x 21.5″. I finished it in April, 2013.
Blog post
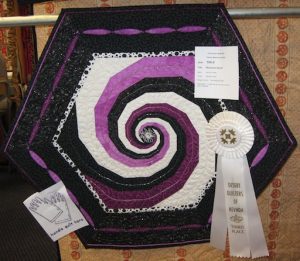
This piece came from a book from a friend in the UK, Pat Storey; her book is called Geometrical Quilts. I loved this pattern at first glance, and it was natural for me to use it as the basis for a challenge quilt for the local guild. We had to use the two black and white prints you see, and we could also use as many other blacks and whites as we liked, as well as one other color. The quilt also had to be embellished, which was a true challenge for me, as I don’t usually embellish mine.
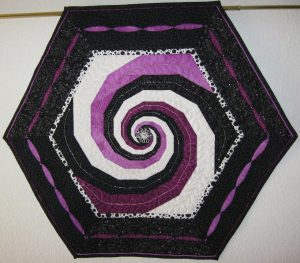
The quilt was paper pieced (Pat’s instructions were extremely clear!) and machine quilted and beaded. The original pattern added triangles to four corners to make the quilt square, but I decided to leave mine hexagonal. It measures 23.5″ x 27.5″ and was finished in April, 2008.
Update: I was able to enter this quilt into our local show in 2011, and it won third place in its category! Here it is with its ribbon:
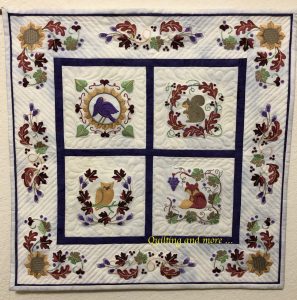
The San Francisco Stitch Company gave away the embroidery files for four really cute little animal blocks with an autumn theme, and I couldn’t resist making them. The border and corner files were more than reasonably priced, so I opted to use them instead of plain borders. The quilt is approximately 18.25″ x 18.25″ and was machine embroidered and machine quilted. I finished it in November, 2018.
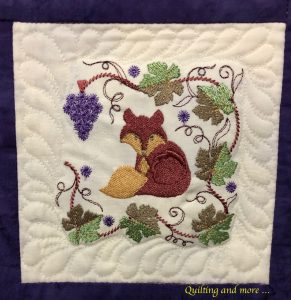
Here are a couple of detail pictures of the quilting. First I did free-motion feathers around the animals in the blocks:
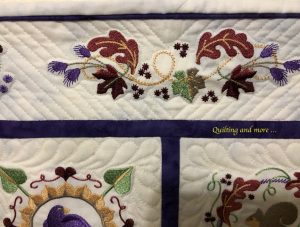
Next, I used ruler work to do the diagonal lines in the borders:
In April, 2019, our local guild had its annual quilt show, and Autumn Twist earned a first place ribbon!
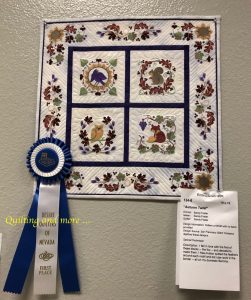
Blog posts: blocks 1-2, block 3, block 4, borders, finished
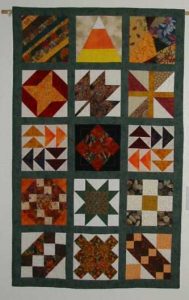
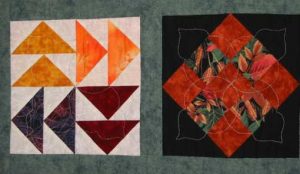
The group I belong to in the Las Vegas area had a block exchange using autumn colors. These are definitely not the colors I usually use! However, I decided to go ahead and join in so as to see what I could do in a different (for me) palette. This is the result, finished in October, 2001. The quilt measures about 52″ x 33″ and was machine pieced and quilted. I stitched in the ditch along each of the sashings and borders and then did a free-motion motif in each of the blocks. I used the same motif in each block to unify the whole.
Here’s a detail of two of the blocks where you can see the quilting:
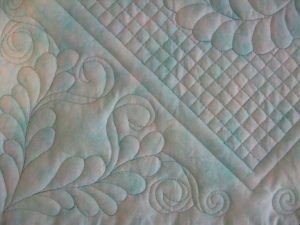
In January, 2011, I took a wholecloth design class from Terri Doyle in Phoenix. There, I designed two quilts, but one must be redone for various reasons. The other, much smaller, one is this one. It’s about 17″ square. I quilted it with silk thread and wool batting (yummy stuff!) and finished it in February, 2011.
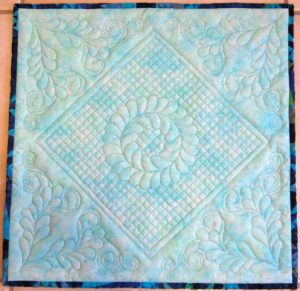
Here’s a detail of the quilting:
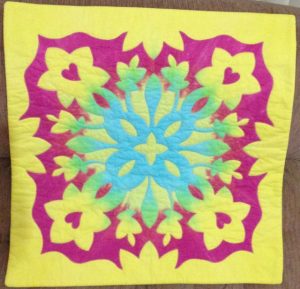
My quilting buddy bought a kit from Stacy Michell. The kit included two identical images, one positive and one negative, of laser-cut Hawaiian appliqué motifs. She did one of the blocks and gave me the other to finish, and so I did. The motifs arrived with fusible already in place, so all I had to do was to fuse them to the background fabric, layer everything with my own batting and backing, and then do some machine appliqué that also became the quilting. I used blanket stitch, and it was fun to do. I didn’t have anything suitable for the binding, so I used a facing instead. The piece ended up 17.5″ square (it really is square, but it’s hanging on a curved chair back!), and I finished it in December, 2012.
Blog post
When two of my grandsons moved out of state, I sent the Advent calendar I’d made previously with them. That meant I needed to make a replacement for the three grandchildren still living here, of course. I bought another panel and made this one.
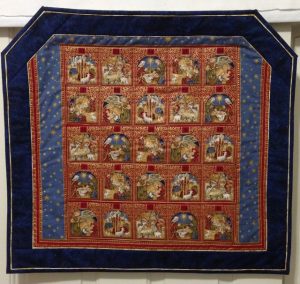
It’s made up of scenes of Bethlehem, and I liked it a lot. I added the corded piping I like so much around the panel, followed by a navy border and more piping before binding it. It is minimally machine quilted and measures 23 3/4″ x 25 3/4″. I finished it in January, 2014.
Blog post


