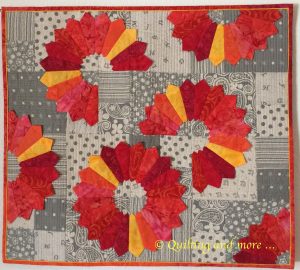
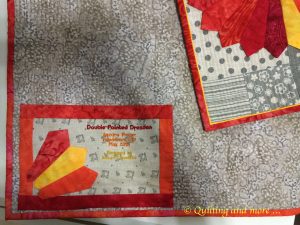
Calling this appliqué is probably correct, but it may be stretching the term a bit, too. Still, the plates were appliquéd onto the pieced background, so the term does fit. This was a pattern created by Susan Cleveland, and I really liked the double points on the plates’ wedges, made easy to do with Susan’s Prairie Pointer tool. The background is made from pieces of linen I’d purchased at a Houston show, and the wedges are bright batiks I had in my stash. I quilted straight lines in the background, dividing the quilt roughly into quarters and doing two of the quarters with horizontal lines and two with vertical lines. I added a few leftover plate wedges to the embroidered label on the back and used the narrow corded piping I like so much next to the binding. I finished the quilt in May, 2015, and it measures 26.5″ x 24″.
Blog post 1, 2
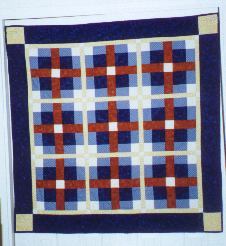
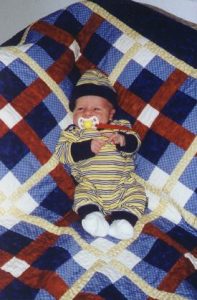
This is a rather untraditional baby quilt, made for Benjamin’s brother, Dominic Easton. He was born right on his due date, April 9, 2001 — a very cooperative baby! He weighed 6 lbs., 15 oz., and was 19″ long. This is a plaid pattern I took from a pattern by Debbie Caffrey, and it’s machine pieced and machine quilted. The machine quilting is a combination of straight lines along the plaid lines and hearts in some of the plain squares. The border has a pattern of adjoining hearts. The quilt is approximately 44″ square.
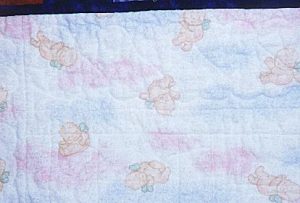
Here’s a picture of part of the back, where you can see the border quilting if you try very hard and squint just right! 😉
And, finally, here is Dominic with his quilt.
Once again, I found a paper-pieced dog pattern in Houston (this time in 2003) that I just couldn’t leave behind! Each dog is dreaming about something special: chasing a cat or a bird, chewing on a big bone, taking a ride in the car, curling up in a cozy house.
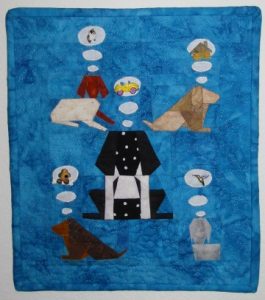
The quilt was maching pieced and appliquéed (satin stitch), and I outline quilted each dog and then did a large stipple in the background. It measures 13″ x 11″ and uses buttons for the dream items. I finished it in November, 2003. I also tried a new-to-me method of binding this one, but I think I’ll go back to my old method. 😉 The pattern was made by Patchwork Plus.
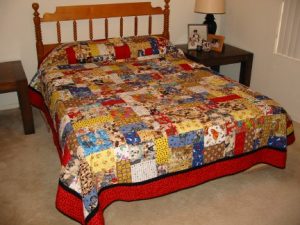
I’d been collecting dog fabrics for several years with absolutely no idea of how I was going to use them. However, so many people were raving over how much fun they were having making Yellow Brick Road quilts that I decided that this might be just what I was looking for. I figured out the measurements I’d need to make one in a double-bed size and set to work. I cut out my fabrics on a Friday afternoon, machine pieced the top (minus borders) over the next few days, and finally put the almost-finished top on the bed I’d intended it for on Wednesday evening. After that, I slowed down a bit and finally finished the machine quilting and binding at the end of May, 2003.
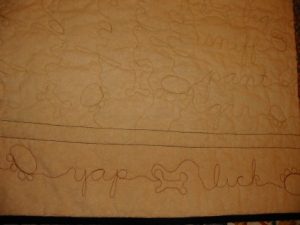
I had a lot of fun with the machine quilting, putting in lots of dog-related words, as well as dog bones and paw prints. Here’s a photo of part of it:
The bed this quilt is for is in our guest room, but it’s also the bed that our dogs back then (Tuppence and Dexter) liked best to curl up on for daytime naps. They apparently approved of the quilt! 🙂
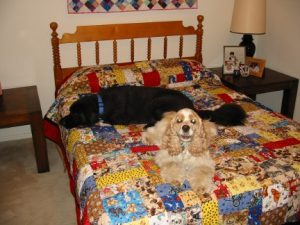
The quilt is machine pieced and machine quilted and measures approximately 80″ x 97″.
This is another of Linda Hibbert’s patterns. I made this as a retirement gift for my husband’s boss at his job supervising student teachers through the local university. This man, who was also my boss when I did the same job for a year, is a Doberman lover. Since I also used to have Dobermans and still love them, I thought a quilt to reflect that was appropriate. It is paper pieced and free-motion machine quilted. I used a variegated thread in the border, but it’s difficult to see. Here is the quilt:

This quiltlet measures 11.75″ square and was finished at the end of March, 2004.
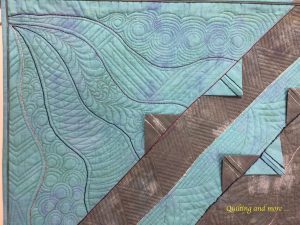
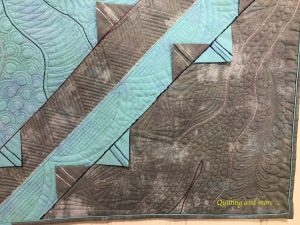
This quilt began as an idea to use some beautiful threads couched onto fabric, but I changed my mind enough times about how to approach it that it really didn’t turn out at all the way I’d intended — and so the title was born. 😉
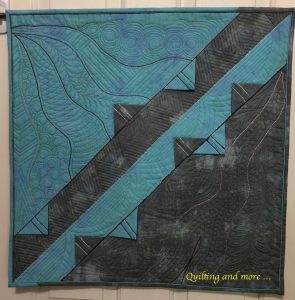
The quilt is approximately 24″ x 24″, and the prairie points are floating in the seams, rather than attached all the way around. The quilting is a combination of free-motion and ruler work, and I added my usual piping before the binding. I finished this one in August, 2018.
Blog post
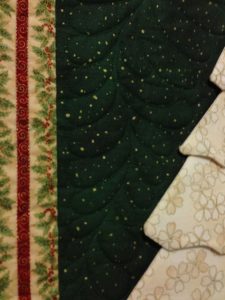
This was one of our monthly projects at Green Valley Quilters in September, 2012. The layers of the tree are attached at the top of each and then tacked down at the outer corners, giving a dimensional effect.
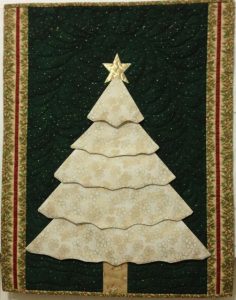
All of the fabrics came from my stash, including the backing and batting. It is completely machine pieced, appliquéed and quilted. The quilting behind the tree includes simple feathers behind the tree branches and wavy lines beside the trunk. There are straight lines in the border.
The quilt measures 21.5″ x 27.5″ and was finished in October, 2012.
Blog post
This was a design begun during a quilters’ cruise onboard Royal Caribbean’s Oasis of the Seas in April-May, 2014. Carol Doak was one of the instructors for the cruise, and she designed the quilt, but I shrank the blocks from 6″ to 2″. It was, of course, paper pieced.

The quilting is mostly curved crosshatching, done by machine.
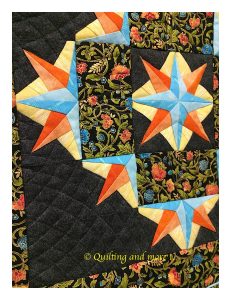
The quilt measures 16″ x 16″, and I finished it in May, 2014.
Blog post
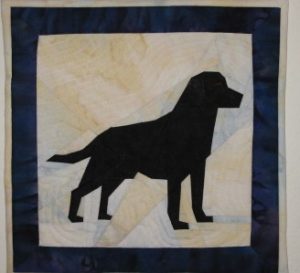
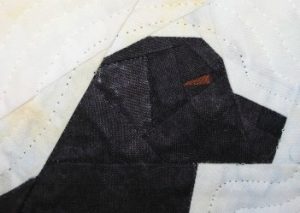
I’ve hadn’t been a paper piecer prior to these little quilts, but when I saw the patterns, I just couldn’t resist. I saw them first at the Houston Quilt Festival in 2002 and bought them to make “someday”. That day arrived in March, 2003, when I was looking for something small and quick to play with. I tried to make them to resemble our two dogs at the time, Dexter and Tuppence. In order to do that, I changed the coloring a little on the cocker spaniel pattern, something that’s easy enough to do. However, the all-black Dexter was more of a challenge. How do you make details show up when the coloring is the same? Specifically, how could I make his ear show against the rest of his black coat? I don’t know that I succeeded very well, but I can see it — in person, anyway! 😉 See if you can in the detail below.
Here’s my attempt at Dexter, who was a lab-chow mix and a real sweetheart.
And here’s a detail showing his head in a close-up. Can you see his ear? 😉
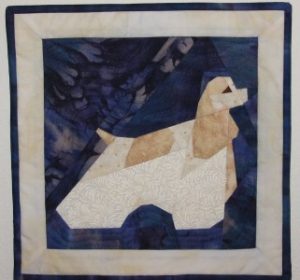
Now here’s the quilt portraying Tuppence, our little cocker who was an affectionate bundle of energy.
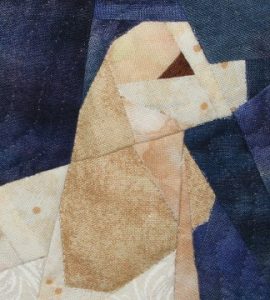
And here’s the detail of her head. You might be able to guess that she was red and white parti-colored.
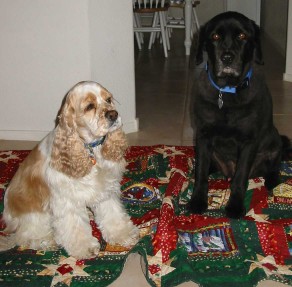
Finally, here are the two dogs as they really looked. You can see more of them on their own pages on this site.
Each little quilt measures 10 1/4″ square, and I finished them the same month that they were started — March, 2003. They’re machine pieced and machine quilted. The patterns were made by Linda Hibbert. You can judge for yourself whether the dogs and the quilts look alike.
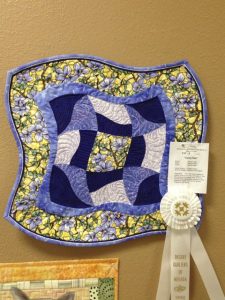
I really like Philippa Naylor’s classes! I took another one in November, 2011, this time on techniques of curved piecing. As so often happens, though, I only finished the center portion in class and let it languish in my pile of “to-dos” until April, 2012. At that point, I decided to add the borders, quilt it and finish it up. So I did! 🙂
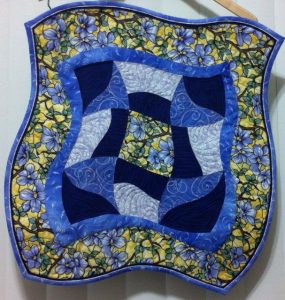
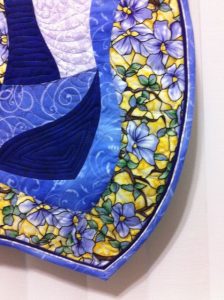
This one is about 21″ square, though “square” is obviously not a consideration here. 😉 This was only the second time I’d done double corded piping next to the binding, and I think it turned out rather well. It’s entirely machine pieced and quilted. Below is a detail of the piping. Because of the curved edges, all of the piping and the binding were done with bias cuts.
Update! This quilt won third place in the quilt show sponsored by our local guild in April, 2013. Ummm … it’s hanging sideways here. 😉