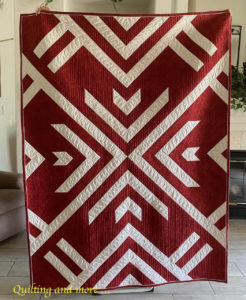
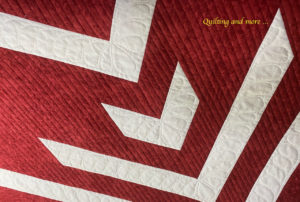
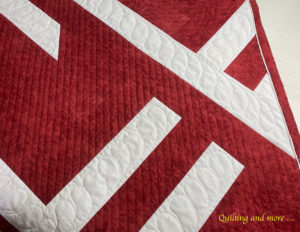
Homecoming is a design from Lo & Behold Stitchery. I made the lap quilt size (approximately 53″ x 71″) in the two-color variation, beginning in February, 2021, and finishing in April, 2021. I quilted free-motion feathers in the white areas and did ruler work diagonal lines, spaced at 1/2″ intervals, in the red. I also put white piping between the quilt top and the binding. The quilt was a gift for our second-eldest grandson (age 20).
Here are a couple of details of the quilting:
Blog posts about this quilt: Homecoming — a quilt and Homecoming quilt
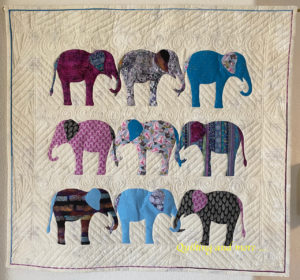
I made this quilt on a whim when I saw a pattern that I liked. The original design had each elephant standing separately from the others, each in its own background square. However, I know that most elephants are actually family units, so I made my elephants connect by intertwining their trunks and tails. The quilt was machine appliquéd and machine quilted, using both free motion and ruler work techniques, and it measures 36.5″ x 39.5″. I finished it in February, 2021.
Blog post 1, 2, 3

This is a banner that hangs in the entry of our home. I used lettering from OESD’s Quilted Alphabet embroidery designs to do the trapunto and quilting, substituting Soft and Stable for the heavy batting suggested in the pattern. The banner measures 34.25″ x 7″, and I added the piping that I like so much. It was finished in November, 2020.
Blog post
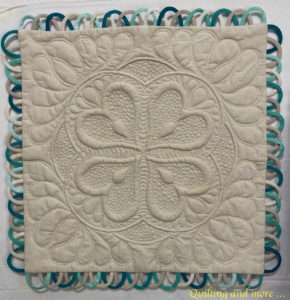
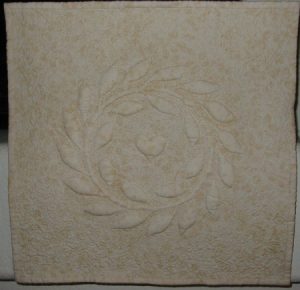
This little quilt is the result of a couple of online classes in a series from Philippa Naylor. The trapunto and the rouleau loops were in separate classes, but they seemed to work together. I really didn’t like the beige fabric I’d used in the trapunto, but it was what I had in the appropriate size. Beige — ugh. When it came time to practice the rouleau loops, I used a gradated fabric in shades of teal and a couple of other beige fabrics in hopes of brightening up the piece.
The feathered quilting between the trapunto and the edge is really too large; a better choice would have been some small, closely-spaced motifs. However, I was in a hurry to finish.
The finished quilt measures about 18″ square and was finished in July, 2020.
Blog posts about this quilt: Further steps, Finished class sample
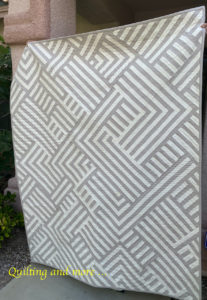
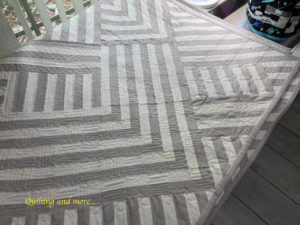
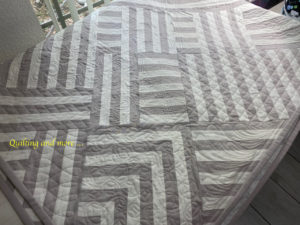
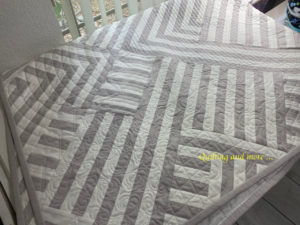
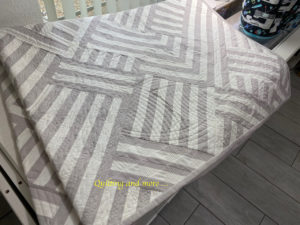
This quilt was designed by Brittany at Lo & Behold Stitchery, and I loved the graphic two-color design. This is the throw size, which measures 57″ x 71″. I began making it in February, 2020, finishing the piecing fairly soon. However, I then took a break during most of March, April and May before quilting it in June and finishing the label in early July. The quilt will be a gift.
I machine pieced the quilt and did free-motion quilting and ruler work to quilt it, placing a different motif in each section.
Blog posts about this quilt: beginning, blocks, quilting, finished.
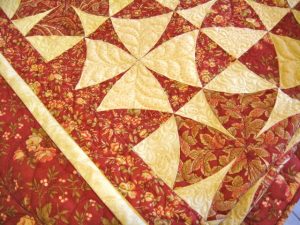
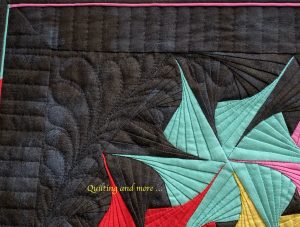
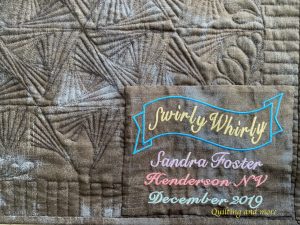
I designed this little quilt in EQ8, following instructions posted a long time ago on an EQ group and referring to an online class I’d taken from Renae Merrill. My first attempt was a disaster, as the entire top was assembled when the seams began fraying; it was irreparable. Just slightly daunted, I began again, remaking the entire quilt top. I’d planned to quilt swirling feathers in the colored portions, but the bulk of those tiny seams and the changing thickness of the seam allowances made that impractical. I ditch quilted those seams instead and moved the planned feathers to the outer areas that square up the corners. Piano key quilting in the border was the final touch before adding the corded piping and binding.
The quilt measures 19.5″ x 17.5″, and each triangular block has 3″ sides and 19 pieces. I finished it in December, 2019.
Below are photos to show the quilting more closely, as well as the label.
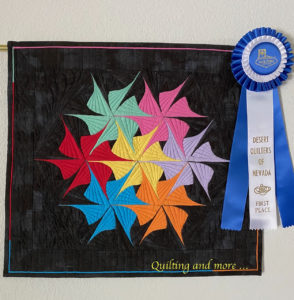
And here is Swirly Whirly with its very pretty blue ribbon from our local quilt show in 2021! 🙂
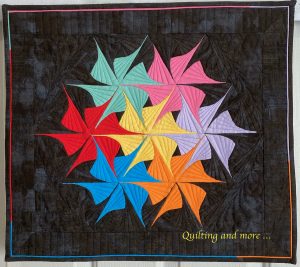
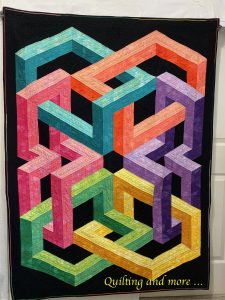
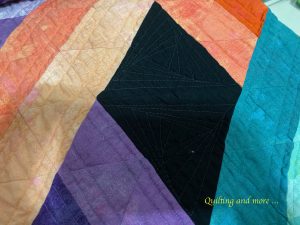
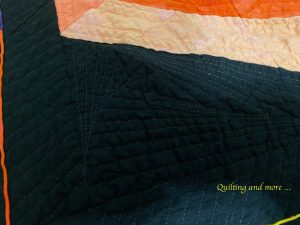
This is a quilt designed by Ruth Ann Berry, and I couldn’t resist the cool optical illusion created with the colors. The piecing is done with 60° triangles, all of which are then assembled in rows before putting the rows together. I quilted the interlocking chains with straight lines to emphasize their movement and then did some fun motifs in the black background areas. The leftover colored fabrics were perfect for corded piping next to the binding. The quilt measures approximately 65″ x 48″, and I finished it in October, 2019, and sent it to a couple of friends.
Here are a couple of details of the quilting.
Blog post 1, 2, 3, 4
This is a small (14″ square) piece I did in a class given by a local guild member in January, 2006. The class was lots of fun, and I finished the quilt in parts of two days.
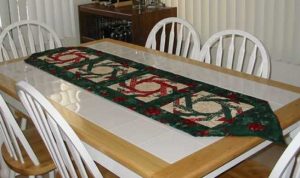
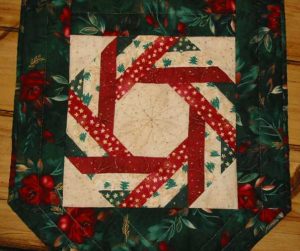
I saw the pattern for this block online (the pattern is no longer online, sorry to say) and decided to make it into a table runner, which I finished in November, 2001. I didn’t have enough of any red or green Christmas fabrics to do all of the stripes the same, so I decided to use two reds and two greens in each block. It worked fine. 🙂 Then I added sashing, borders and triangular end pieces to the blocks. The finished table runner measures approximately 68″ x 16.5″. This is a photo of the runner on our table:
And here is a detail where you can see part of the machine quilting. I used gold metallic thread on this, since most of the fabrics had a touch of gold in them, too. The quilting motif in each block is a snowflake, though it’s difficult to see here.
I really prefer making smaller quilts, but our current bed quilt has taken a lot of abuse with dogs jumping up and down — and I don’t mind at all that dogs like to be on beds. 🙂 Since I’ve wanted for a very long time to try the Winding Ways pattern, that’s what I decided to use for the new bed quilt. I found some lovely Moda (mostly) fabrics and a very good book by Nancy Elliott MacDonald on how to make the blocks successfully — and it all came together. 🙂 I decided which free-motion quilting designs I wanted to use on it, but that’s where I stalled. Unfortunately, since the quilt is so large, I just couldn’t see how I was going to manage it in my then Bernina 630 and with some back problems of my own. However, a very good friend came to the rescue and did a gorgeous job of quilting my top on her longarm machine, adapting my quilting ideas a bit to what worked better for her. The next problem was how to get a photo of the quilt! I just have no place in my home to take a picture of such a large quilt! 😉 The problem was solved, though, by entering the quilt into our local show and taking a photo there — complete with its lovely blue ribbon from that show! 😀
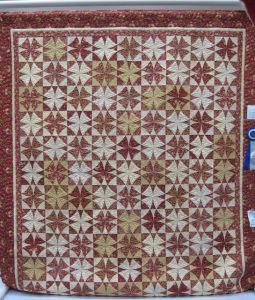
The quilt was finished in February, 2011, and measures approximately 95″ x 112″. Here is a detail of some of the quilting: