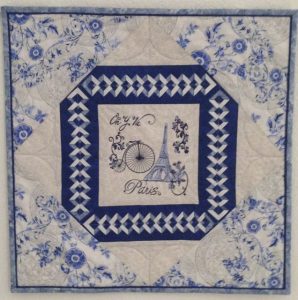
I happened to see a set of machine embroidery designs at the local quilt shop, and I fell in love with them. I used the pattern for a cushion found in Creative Expressions magazine (issue 34) to make this little (18 3/4″ square) wallhanging. The embroidered center is bordered by braids done with the Double Diamond ruler (not easy to use for a left-handed person!), and I added corded piping before the binding. I finished this in May, 2013.
Machine embroidered center, “braided” inner border.
My mother-in-law loved blue and yellow almost as much as I do! 🙂 She needed a runner to use on her coffee table to accent a vase, so I made this one for her.
The two end blocks are from a free pattern on Carol Doak’s web site, and the center block is from her book Mariner’s Compass Stars. The runner measures 17″ x 48″ and was completely machine pieced and machine quilted. I finished it in September, 2007, and gave it to my mother-in-law for Christmas.
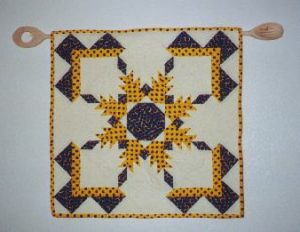
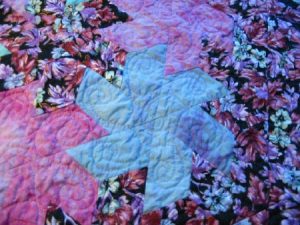
A secret pal gave me the muslin foundations and several fat quarters for these blocks. I set the blocks on point and added machine trapunto (my first effort at this technique!) to the center square and the setting triangles. This quilt was finished in September, 2001, and measures approximately 33″ square. It was machine pieced and machine quilted.
Below is a detail of some of the machine trapunto. It would have shown up better on light-colored fabric.
This was the result of a terrific class I took from Sharyn Craig at Quilt Camp in the Pines in 1999. I needed a small (20 1/2″ square) wallhanging for my kitchen, and this fit the bill. It was machine pieced and machine quilted.
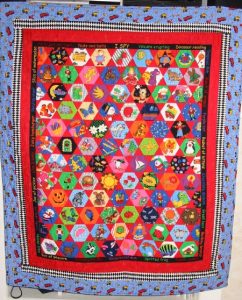
Just as it suddenly became obvious a couple of years earlier that Benjamin needed a “big boy” quilt to take to preschool, Andrew and Dominic also needed the same sort of thing! I had foreseen this, however, when I bought the preprinted panel for Benjamin’s quilt; I’d bought two more of the same panel at the same time. So now those two have become nap quilts for preschool, too. 🙂 The center panels are identical, but I used different border fabrics and quilting motifs. Here is Andrew’s quilt:
Andrew loves big trucks, so the border fabric seemed a good choice for him, and I used variegated thread to do lines of cars and trucks in the red border. It measures about 41″ x 50″.
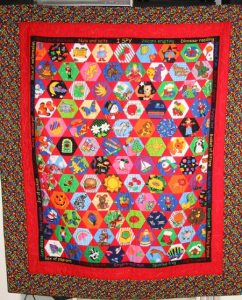
Dominic’s quilt is similar:
I used the same thread to do rows of five-pointed stars in the border of this one. The quilt measures approximately 41″ x 49″, and both quilts were finished in June, 2004. They were both machine pieced (just adding borders) and machine quilted.
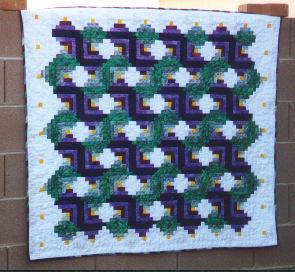
I made this quilt for my husband to use as a throw (it measures 45 1/4″ x 50 1/4″). It took me a long time to come up with what I wanted to make for him, but I knew it had to have purple in it, since that’s his favorite color! I finally settled on this Log Cabin variation, giving a woven effect; the layout for it was sent to me by another quilter online. I then translated that layout into a QuiltPro pattern to make my life easier. The quilt is machine pieced and machine quilted, and I finished it in January of 2000.
I used yellow for the center of each log cabin square, just to brighten things up a bit. Since Mike loves to garden, I machine quilted the names of his various crops into the white borders. This includes chiles, tomatoes, peaches, and lots of other fruits and vegetables. The logs in the pattern represent the logs he used for his square foot gardening, and there are lizards quilted into some of the blocks; they’re to keep the insects away! Even the back of the quilt is garden-themed, as it’s a vegetable and garden-tool print.
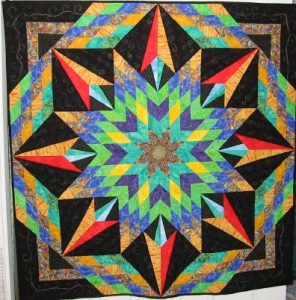
This quilt is also the result of a class at Quilt Camp in the Pines, but it was from July of 2002. The class was Jan Krentz’s Summer Salsa, though I’ve renamed my version since my husband thinks this one is “colorful”. 😉 Jan teaches wonderful classes; she’s very organized and gives lots of information and help. I finished most of the inner star points and one rocket block during the two-day class, then brought everything home and finished the rest in the course of the next few weeks, substituting simpler corners for Jan’s original ones in order to spotlight the focus fabric I’d chosen. Then I was at an impasse trying to decide how I wanted to quilt it! I finally bit the bullet and machine quilted it in January, 2003. I used a variegated rayon thread for all of the quilting except for some angular lines in four black corner sections; those were done with a bright yellow rayon. All of the quilting was done free-motion style. The quilt measures 46″ square.
In the photo below, you can see a detail of the quilting in one of the corners.
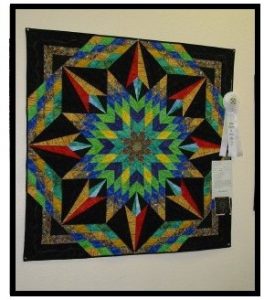
This quilt also went into our local show in April, 2003, and it also won a ribbon! It took third place in its category, so here it is proudly wearing its award:
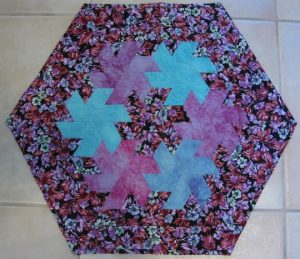
I was intrigued by Martha Thompson’s technique, outlined in her book and shown on Simply Quilts, for taking hexagons and turning them into what she calls “swirligigs”. This is one of the patterns from her book, though I used several colors of hexagons where she used a single one. I happened to have some hand-dyes in my stash, so I used them with a background that I also already had and came up with this piece:
This was a fast, fun project. It took only parts of four days from start to finish! Since the hexagons-turned-swirligigs seem to have a lot of movement in them, I quilted them with a swirling pattern to underscore that movement. Here is a detail of the quilting:
The little quilt measures 21″ across the narrower dimension and 24 1/2″ across the wider one, and I machine pieced and machine quilted it, finishing in October, 2004
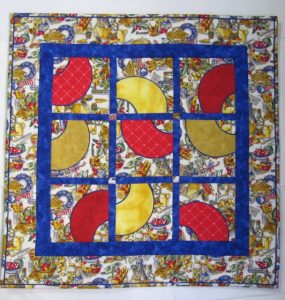
In January, 2012, some friends and I attended a retreat in Lake Havasu City, AZ; it was such fun! There, I took a class from Susan Cleveland, who developed the technique I so often use in putting corded piping next to my quilt bindings. This time, though, we used the corded piping within the blocks to go around curves — a really fun effect! Check out her book, called Piping Hot Curves for this pattern and technique. I used fabric I already had in my stash; it was pretty dated, but it’s made a cute little quilt I’m planning to use in my car when our little dog takes a ride; it will save the upholstery from getting road oil (we have a lot of road oil!) all over it from her paws.
I finished the quilt, which measures 28 1/2″ square, in February, 2012, and it has very little quilting in it, for a change. 😉 That’s because the piping in the blocks would begin to bulge if I’d quilted a lot. So I’ve quilted in the ditch and a couple of curved lines in the background of the blocks and borders. I also added piping next to the binding — of course. <g> Here’s a closer shot of one of the blocks:
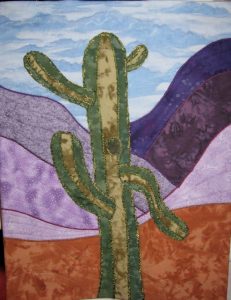
In July, 2009, I took a class from Rose Hughes on making landscape quilts. It was a fun class, but it’s not a technique I think I’ll be using again; it’s just not something that appealed to me. Because I wasn’t that excited about it, the unfinished quilt sat around until the end of October, 2010, before I finally finished it. It was supposed to have quite a bit of beading and embroidery to embellish it, but that just wasn’t going to happen. It’s machine appliquéed, using yarn zigzagged around all pieces and extra stuffing under some of the saguaro arms. It’s also machine quilted very simply, and I used a facing to finish it, rather than binding. This piece measures approximately 17″ x 23″.