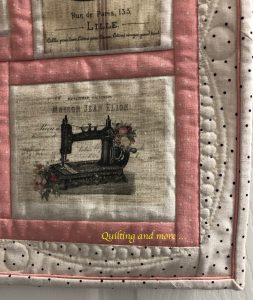
This was a very quick project, made from some printed linen motifs and framed with more linen. It’s the second time I’ve worked with linen from this French seller (l’Atelier d’Isabelle), who comes to the Houston Festival. The fabric is so lovely to work with — so soft and smooth!

The piece measures about 14″ square and was finished in December, 2018. I did very simple quilting, since I didn’t want to quilt inside the printed motifs. Instead, I simply stitched in the ditch around them and then added the swags and circles in the outer border before adding the piping and binding.
Blog post
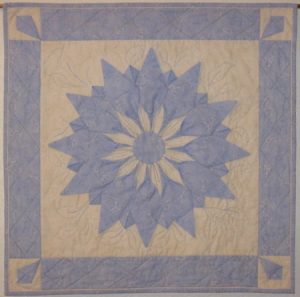
This is the first of three small quilts begun in classes given by Jennie Rayment at Quilt Camp in the Pines in July, 2007. Her classes were fantastic! This little quilt measures about 25 1/2″ square and was machine pieced and quilted, with a few little “twiddles” added by hand. I finished it on July 31, 2007, adding some corded piping into the binding.
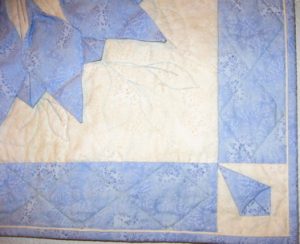
And here is a detail of one corner:
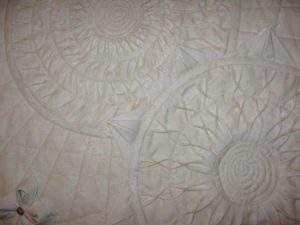
This one — from another class with Jennie Rayment — was lots of fun to make! The upper circle has 36 tucks sewn into it; each tuck was then twisted in opposite directions several times to get the effect seen here. The lower circle has only 18 tucks; these were brought together and tacked. Finally, the tucked points (Babies in Baskets) were added around the outside. After machine quilting the “rays” emanating from the circles, I added the little four-petaled “flowers” (I believe they’re called Folded Fabrications) with a button in the center of each. The quilt measures 32″ x 23″ and was machine pieced and machine quilted, with some of the twiddling and fiddling done by hand.
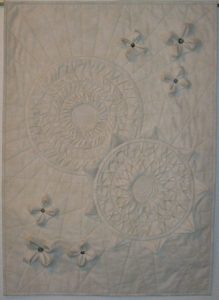
This is a detail of parts of the circles:
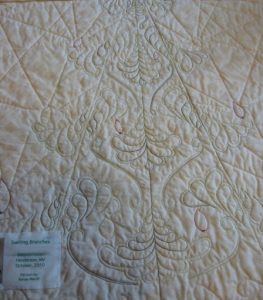
I took a machine trapunto class from Philippa Naylor at the Houston Quilt Festival in November, 2011. She gave us several patterns to choose from, and I combined elements of a couple to come up with this design. I used a combination of wool and cotton/poly batting for the trapunto layer and Superior Highlights thread for the quilting. I finished it in January, 2012, and it measures 21″ square.
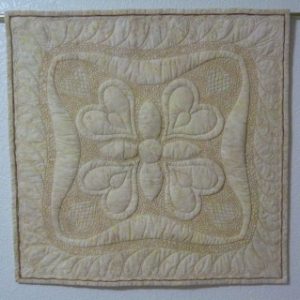
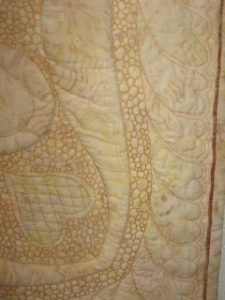
I used pebbled stippling to flatten the background behind the trapunto motifs, and I also decided to adapt the feathers I like so much so that they resemble the hearts in the main portion of the quilt. The color in this detail photo is much more true to what the quilt actually looks like.
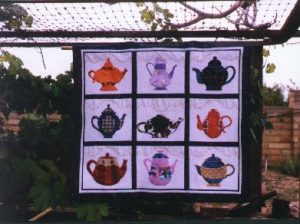
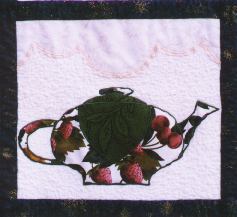
I like tea, so when I saw the pattern for this quilt, I just couldn’t resist! This was done using the same technique as for the dogs. That is, the pots were fused and then machine satin stitched. However, instead of hand quilting, I machine quilted this piece. It was only the second time I’d done free-motion quilting on the machine, but the quilt won a blue ribbon in the 1998 county fair. What a lovely surprise! The quilt measures 34″ x 32″.
And here’s a detail of the center teapot:
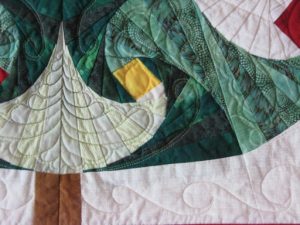
I saw the pattern for this in the November, 2010, issue of American Quilter and was immediately intrigued by the very curvy effect of the straight-line piecing. The tree itself was paper pieced, though the background was added with traditional piecing. The pattern was designed by Renae Merrill. The finished piece measures 22.25″ x 19.5″, and I machine pieced and machine quilted it, finishing in October, 2010.
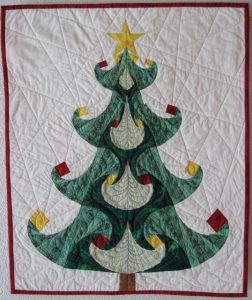
Using a variegated green thread, I put feathers into the light- and medium-green tree branches, with a swirl in the darker green. The background is done in straight lines of cream thread to suggest the light coming from the candle flames, and the area beneath the tree is done with a simple curlicue. Here are a couple of detail shots to show a bit of the quilting:
Blog post 1, 2, 3
It had been a long time since I’d done a swap, but there were two swaps in recent years among the members of my local group, and I couldn’t resist either one. The first, signature blocks, was done in October, 2010, and I really liked the idea of having signature blocks from these ladies who’ve been my friends for so long, so I participated even before I had any idea of what I’d do with the finished blocks. The second one, in July of 2011, was for exchanging half-square triangles, and that gave me the idea of combining these with the signature blocks to make baskets! Yay! I decided to set the baskets together in strips and on point, leaving room for some of the feathers I like so much. This photo of the quilt is really bad, but I needed to keep it a bit blurry to disguise names and maintain privacy. However, you can see how the baskets are set into the quilt.
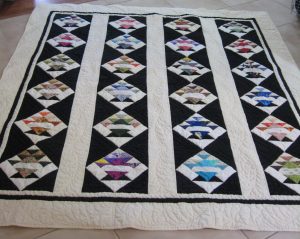
As you can see, I machine quilted feathered swags into the plain strips between baskets, as well as into the borders. The baskets are outlined, and the setting triangles have concentric V’s quilted into them. The quilt measures approximately 70″ x 87″, and I finished it in April, 2012.
Blog post 1, 2, 3
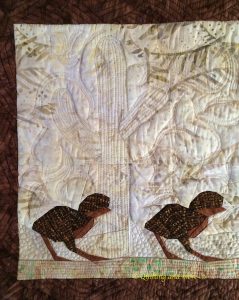
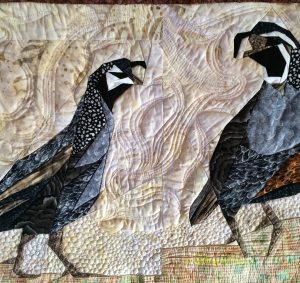
When I saw this design offered as a class at the Lake Havasu, AZ, retreat, I knew I had to do it — I so enjoy watching quail run along on the wall around our back garden! It’s a paper-pieced pattern by Linda Hibbert. The quilt measures only 12.75″ x 33″, but I love the design.
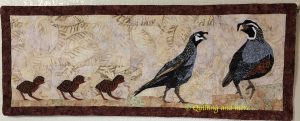
I had a small silk batting I’d been wanting to try out, so I used it here, along with some silk thread for some of the background free-motion quilting, which I wanted to make rather unobtrusive. The saguaro cactus, though, is done with Superior Magnifico thread to make it a little more obvious. The border curved motif was quilted with Isacord polyester for a bit of subtle sheen.
Blog post 1, 2, 3
I bought my first kit when I went to the Houston Quilt Festival in November, 2010. It was a laser-cut kit for a miniature Storm at Sea, done by John Flynn. I’ve wanted to do this design for a long time and just couldn’t resist trying it this way. I think I’d normally do this pattern by paper piecing it, but this was a fun change. The pieces went together so easily because of the precision of the cutting and because the tips of the triangles had been cut off to facilitate matching. I machine quilted lavender feathers in a few of the diagonal rows, then used turquoise thread to add stylized wave patterns to the other diagonals. The outer border has larger, curlier waves, and I added corded piping between the outer border and the binding for a bit of added interest.
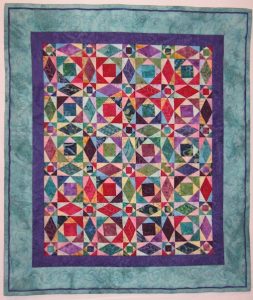
The center of the quilt is 14″ x 17.5″, and the finished quilt measures 21″ x 23.5″. I began working on it in late December, 2010, and finished in early January, 2011.
Blog post 1, 2, 3
Carol Doak sponsored a BOM for her online group, beginning in September, 2007, and ending the following August. I made all of the blocks at 3″ square and then couldn’t decide how to set them together. As I was trying to solve the problem, the 4000th member joined the group, and Carol designed another block to celebrate. That block became the center of the little quilt with the BOM blocks.
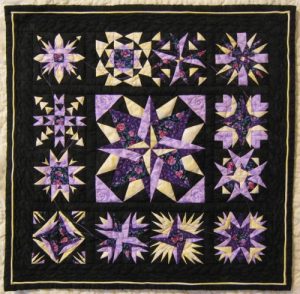
All of the blocks are in shades of purple and lavender with yellow as an accent and black as the background. The quilt measures 15 1/4″ square and is machine pieced and machine quilted. I finished it in August, 2008.