The local quilt circle I belong to had a block exchange with a Christmas theme in October, 2003. We had to select our block patterns from a list and then made them in our choice of two sizes: 6″ finished or 12″ finished.
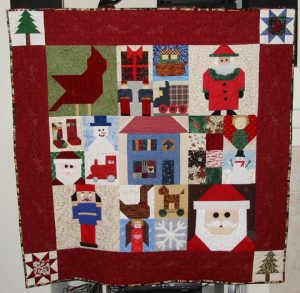
As you can see, I grouped sets of four of the 6″ blocks together and alternated those sets with the 12″ blocks. I had four blocks left over, so those became the cornerstones for the border. I machine quilted this with a motif of continuous-line five-pointed stars in a variegated thread — a mistake, since the colors melted into the fabrics. :S The quilt measures 47″ square and was finished at the end of July, 2004.
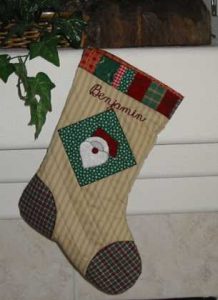
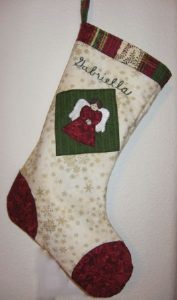
I made the first two stockings in September, 2001, for two of our grandsons. Both use machine appliqué and machine quilting. The appliqué motifs were fused onto the fabric and then blanket stitched in place. Each stocking measures approximately 16 1/2″ tall and 11″ wide from heel to toe. The first one is for Benjamin.
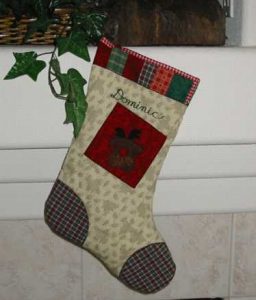
And this one is for his younger brother, Dominic.
And now I’ve had to add a third stocking, since these boys now have a little sister. 🙂 I made this one, which is the same size as the other two, in September, 2007.
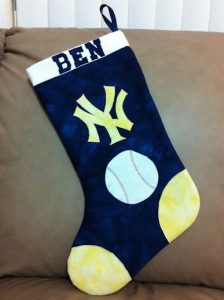
Here’s yet a fourth stocking! Our son-in-law had noted that his stocking was the only one hanging in their home that wasn’t handmade; it was one of those generic ones from a discount-type store. He had definite ideas on what he wanted his to look like, and he finally sketched those out for me so I wouldn’t be guessing. Yesterday I spent the day making his stocking, so it’s ready in plenty of time for next Christmas, since it’s only April (2012) now. 😉 Can you tell what his favorite sport and team are?
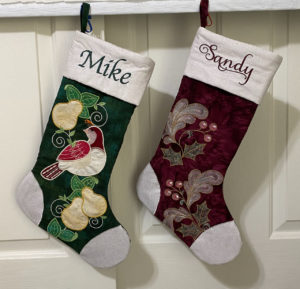
And here are the latest Christmas stockings. Since my husband and I had never had stockings, I decided to make us some decorative ones to hang on the fireplace. These were done with the embroidery module of my Bernina 790+ from a design from Embroidery Online, and I made them during Thanksgiving weekend, 2020, and they’re about 18″ tall and 7″ wide.
Blog post
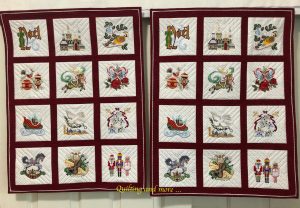
The San Francisco Stitch Company issued some Christmas designs, and I decided to make two sets of them as gifts for our daughters. The blocks were 4″ designs, and the quilts ended up at 21″ x 27″. I used ruler work for the very simple free-motion quilting and finished them in April, 2019.
Blog posts: blocks, more blocks, finished
Have you noticed yet that I seemed to spend a lot of time at Quilt Camp in the Pines? 😉 Sadly, it has closed. This is the result of yet another class there. I’ve always been intimidated by hand appliqué. I tried it a couple of times with less than wonderful results, so it was with great trepidation that I signed up for a class in Celtic hand appliqué, taught by Nancy Chong at camp in 2004. However, I think I’ve finally found a version of hand appliqué that I like and that I can do at least passably well!

This is hand appliquéed and the hand quilting echoes the appliqué motifs both in the “ditch” and 1/4″ away. Here’s a close-up of the quilting:
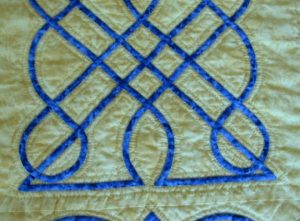
It measures 13.25″ x 47″ (tip to tip) and was finished in June, 2005.
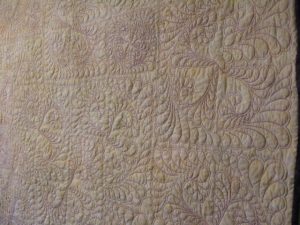
It had been a very long time since I’d done a Drunkard’s Path quilt, but I do like the curves in this design. When I saw a new technique of doing them online, I couldn’t resist. I dug out some beautiful batiks I’d inherited from a local quilter who had passed away and used them to make Cecilia’s Circles. I named the quilt after the quilter who’d given me the fabrics. This was entirely machine pieced and machine quilted. For the quilting, I used a variegated purple/raspberry thread, drawing the curve of the spine of each feather onto the block and then doing the feathers themselves freehand. I didn’t think this particular quilt needed a border; I didn’t like the idea of the circles and partial circles being “contained” by any border. Here is the finished quilt, which measures 45″ x 45″, and which I completed in April, 2011.
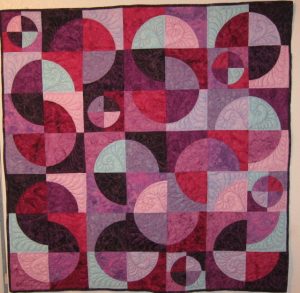
The next two photos show a close-up of the quilting from the front and from the back of the quilt: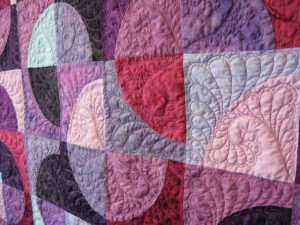
Blog posts: blocks, layout, finished
One winter I saw a lovely quilt made with a variety of embroidered trees — and I loved it! I immediately went to the digitizer’s site and bought the designs in order to make my own version. As soon as I’d finished ‘Tis the Season, I got busy with this quilt. I ended up buying sashing fabric three different times before finding one that I thought worked well! The quilt is machine embroidered and free-motion quilted on my Bernina 780. For the quilting, I used several different all-over fillers in the blocks, followed by circle-filled swags in the borders. I finished it in September, 2016, though I did go back later to add some crystals to it. The quilt measures approximately 26″ x 40″.
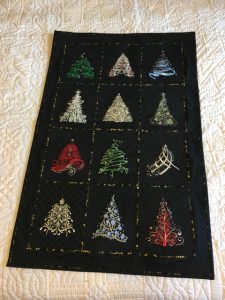
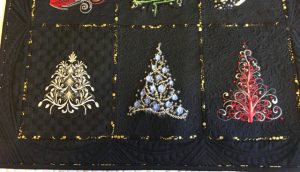
Blog posts: embroidery, continuing, quilted
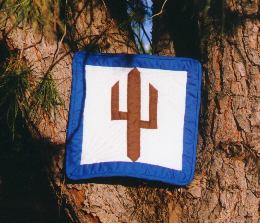
This is a very small wallhanging (about 14″ square) that I made as a beginner. I liked the pattern of the saguaro cactus, since we had so many of them near where we lived at the time. I machine pieced and hand quilted this.
This is not only appliqué; it’s also drappliqué! I took a class from Pam Holland at Quilt Camp in the Pines in July, 2005, and her technique combines machine appliqué with drawing on the fabric with special pens to make the fabric look the way we need it to look. The quilt is entirely machine appliquéed and quilted, measuring 19″ x 23″. I finished it in September, 2005. I didn’t actually do that much quilting, since the appliqué was combined with the quilting in the main part of the piece. The wide border is quilted in a stylized wave pattern.
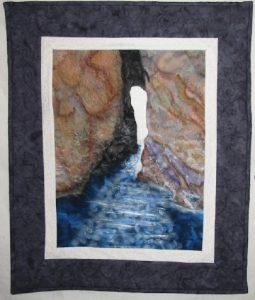
And here is the photo that inspired the quilt:

This quilt went together so easily that it’s almost embarrassing! It measures 61″ x 57 1/2″, and it was the first I made from the Fat Quarter Quilts book. It’s machine pieced and quilted; I had a wonderful time doing the free-motion quilting on it! I used variegated thread in two different browns and a green to make the vines and leaves that are climbing up this “wall” of broken bricks.
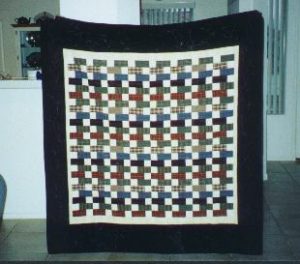
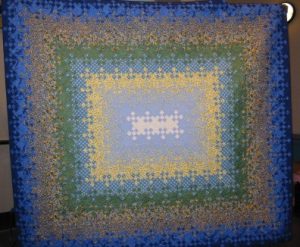
I needed a new quilt for my queen-sized bed, and I love this pattern, so this was an easy decision. What wasn’t so easy was deciding on the fabrics to use, especially since I wanted to use ten fabrics, rather than the eight in the original pattern. Thanks to the help from a couple of RCTQ members (thanks Susan M and Nancy!), I had revised measurements to consult and lots of very good tips. I bought the fabric for this in late 2001 with help from a very artistic friend, but I didn’t start making it until October, 2002, because I found out that Blanche Young (the originator of the pattern) would be in town for a class in this very pattern! I finished the top in late November, 2002, and did something I’d never done before — I took it to a long-arm quilter instead of quilting it myself. It was so large that I didn’t want to wrestle with it to machine quilt it, and it was too busy to benefit from hand quilting, so that left a commercial quilter as my choice. She did a gorgeous job with it, getting it back to me in early April, 2003, so that I could bind it and put a label on it. The quilt measures 95 1/2″ x 105 1/2″ and was entirely machine pieced.
